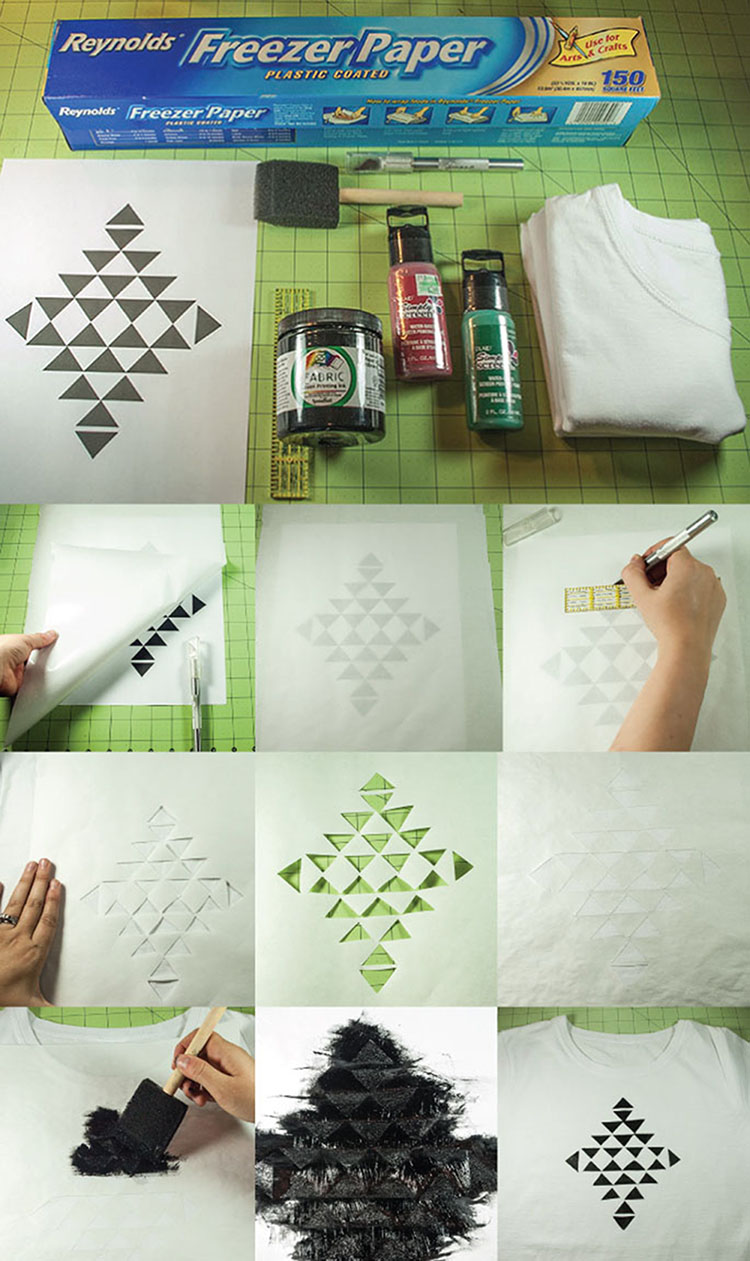
Freezer Paper Screen Print
Did you know you can design your own custom screen prints at home without any fancy screens, photo emulsion, or squeegees Of course, you're not going to get as nice of a print, because this is really more of a stencil. But, you can still customize tee's at home relatively easily and inexpensive. Behold, the magic of freezer paper. Did you know when ironed, freezer paper sticks to fabric. Yeah, I didn't either until I took a textile printing and dyes course in college. We did all sorts of fun things I plan on sharing with you. This was one of them!
Supplies
Freezer Paper
T-shirt or fabric
Exacto knife
cutting mat
Fabric Screen Printing Paint
1. Print template below or you can draw your own design. You could even draw right on the freezer paper if you wanted too! Or, how about printing text! 2. Lay freezer paper (shiny side down) over template and tape to cutting mat. If you made your own template, you can trace it directly onto the freezer paper or just cut straight away like I did. 3. Using a ruler and an exacto knife cut out the shapes. Don't worry if your cutting isn't perfect. If some of the shapes tear, no worries. You will iron them in place later. 4. Iron template to fabric in desired location. 7. Paint. 8. Keep painting. Make sure to coat the fabric really nicely. I let the t-shirt sit for an hour or so and then carefully peeled away the freezer paper. Then, I let dry over night and heat set with an iron. But, make sure to read the direction on your fabric paint!
#. - Indicates corresponding photos above.
I love this project because the possibilities are endless and it's so much fun! I hope you have fun making all kinds of fun things with this technique. -Ruth-
Labels: DIY, Screenprint


2 Comments:
cute! great idea. ive seen it before in other blogs but not as easy as this one :)
thanks again!
love how this turned out!!
Post a Comment
Subscribe to Post Comments [Atom]
<< Home